Simulating Poor Network Conditions with Linux.

Some Background
Click here to skip straight to the examples.
What is Latency, Bandwidth and Loss ?
Network performance is a complex topic, and there is more detail than I’m going to be able to cover in this blog post, so this does a lot of simplification, both intentionally and unintentionally.
Bandwidth and Latency are two measurements typically used to describe network performance. Bandwidth is how much data you can send between two computersin a given period of time. Latency is how long it takes to get the smallest unit of data from one computer to another. An unexcat analogy is bandwidth is how many palletes you can load onto a truck, and latency is how long it takes a truck to get from a factory to a warehouse.
Packet Loss, is the percentage of packets that are lost in transit, for a variety of reasons. For typical HTTPS traffic, this will mean packets will need to be retransmitted, and often that the server will slow down how quickly it is sending data back to the client.
This has (at the time of writing) become a hot topic on tech twitter. The experience a user will have with you website, application or service will depend on those three factors. Lets examine some realistic scenarios.
The low bandwidth / low latency user
Some users will just have a low bandwidth connection. Perhaps they are very rural and only have a slow ADSL connection in the single digit mbps. Perhaps they are on a mobile connection similarly in a rural location with only 3g.
This user cannot transfer data quickly, so things like large images will take a long time to load, and video playback may be low quality and buffer. If you have a large javascript single page application, it may take a long time to load as well, with the user just seeing a spinner.
However, for client/server interactions that don’t take a lot of traffic, assuming the user has a low latency connection, they will not really notice the impact of the low bandwidth they have.
The high bandwidth / high latency user
If you have a server say in London, England and a user in Auckland, New Zealand, then the latency will be very high. Intenet packets going all the way around the world like that will typically take around 130ms for a one way trip, so around 260ms for a round trip. This is the speed of light in fibre optics, and the paths those fibre optics take around the world.
Even if the bandwidth is very high, the minimum time it will take to get anything to happen is going to be on the order of around a quarter of second.
This user with high bandwidth, but also high latency will see images and applications load reasonably quickly, and video playback will be smooth and buffer free. However when they press a button, or do some other interaction that requires a server response, this will feel slow and laggy. This is especially true if they need to take several actions in a row that require that server response.
For example, a user clicking an increment button that requires the server to confirm that increment is okay and update the UI. If the user needs to click that 10 times, and the server takes 250ms to respond, the quickest they can do this interaction is 5 seconds !
Finally, for specifically web development, latency is one of the key reasons to avoid waterfalling in loading. Each waterfall “step” tests out the users latency, and even a user with a 100Gbps connection can’t beat the speed of light.
The high packet loss user
How internet connections react to packet loss is a very complicated topic. It depends on if you are using TCP or UDP, what congestion control algorithms from either you are using, and do you intend to recover by retransmitting the packet (typical in TCP), or by the application handling the fact the datastream is incomplete (like in say UDP based video game). You can’t say UDP works differently from TCP either, as QUIC is UDP based, but reimplements the ideas of TCP anyway.
Packet loss can come for many reasons. It can be the result of electromagnetic interference for users on wifi or cellular networks, or it can be the result of a congestion in the buffers of devices in the network. It can also come in many forms, it can be sporadic (such as a routers buffer becoming temporarily full), or it can come for longer periods of time (such as a user on a train going through a tunnel).
Users with packetloss are going to experience intermittenaly poor connectivity. This is partiuclarly true for single packet exchanges. Mild packet loss for a download can be mitigated. Assuming TCP is in use, the hosts will know packet 2 has been lost when packet 3 arrives before it, and will request a new copy of packet 2 (using selective acknowledgements).
But for a single packet, it will take the timeout for the ACK. How long this is implementation dependant, but at worst it can be several seconds. This is like the Two General’s Problem. You can’t detect a packet has been dropped and do a fast retransmission if you have no way to know if you should have seen a packet or not in the first place.
Simulating Network Conditions with Linux.
Example1: Adding outbound latency with tc
You can add, test and remove constant latency to a network interface with the following commands.
$ ping -c 10 -q www.google.com
PING www.google.com (2a00:1450:4009:823::2004) 56 data bytes
rtt min/avg/max/mdev = 17.976/19.970/22.120/1.044 ms

$ sudo tc qdisc add dev enp7s0 root netem delay 100ms
$ ping -c 10 -q www.google.com
PING www.google.com (2a00:1450:4009:817::2004) 56 data bytes
rtt min/avg/max/mdev = 117.666/119.381/121.019/1.003 ms

$ sudo tc qdisc del dev enp7s0 root netem delay 100ms
$ ping -c 10 -q www.google.com
PING www.google.com (2a00:1450:4009:823::2004) 56 data bytes
rtt min/avg/max/mdev = 18.647/20.588/22.283/1.110 ms
Note: Because of how this works, it only impacts packets being SENT by the system, not on packets being received by it. This means on a single host you can for example simulate. For most cases this is not a problem, but for some applications it will actually be relevant. An example might be video games. The game will “feel” different if it takes 100ms to tell the server you shot a bullet, and 100ms for the server to tell you what you hit, than if it takes 10ms to tell the server you shot that bullet, but 190ms for it to reply. Both are 200ms round trip, but they will feel different to the user.
Example2: Adding outbound packet loss with tc
You can use tc to add packet loss to a network interface with the following commands.
$ sudo tc qdisc add dev enp7s0 root netem loss 10%
$ ping -c 100 -i 0.01 -q www.google.com
PING www.google.com (2a00:1450:4009:80b::2004) 56 data bytes

100 packets transmitted, 91 received, 9% packet loss, time 1520ms
rtt min/avg/max/mdev = 18.081/20.011/23.265/0.938 ms, pipe 2

$ sudo tc qdisc del dev enp7s0 root netem loss 10%
$ ping -c 100 -i 0.01 -q www.google.com
PING www.google.com (2a00:1450:4009:81f::2004) 56 data bytes

100 packets transmitted, 100 received, 0% packet loss, time 1473ms
rtt min/avg/max/mdev = 16.363/19.011/24.427/1.388 ms, pipe 2
Note: Just like with the latency example, this only impacts packets being SENT by the system, not on packets being received by it. So in terms of testing the effect on a TCP download, this is dropping the ACK packets, not the data packets.
Example3: Adding inbound loss with iptables
You can however use iptables to add inbound packet loss. You would do this with :-
$ sudo ip6tables -A INPUT -m statistic --mode random --probability 0.1 -j DROP

$ ping -c 100 -i 0.01 -q www.google.com
PING www.google.com (2a00:1450:4009:80b::2004) 56(84) bytes of data.
100 packets transmitted, 87 received, 13% packet loss, time 6536ms

$ sudo iptables -D INPUT -m statistic --mode random --probability 0.1 -j DROP
Remember to use ip6tables for IPv6 traffic and iptables for IPv4. You will need to do both if your application is dual stack and you use happy eyeballs. Here I only did ipv6 as I knew that is what ping was using.
Example4: Adding outbound jitter with tc
In the first example, we added constant latency, but latency also comes in the form of jitter. Jitter is the random variation in latency. You can add jitter to a network interface with the following commands.
$ sudo tc qdisc add dev enp7s0 root netem latency 0ms 100ms
$ ping -c 100 -i 0.01 -q www.google.com
PING www.google.com (2a00:1450:4009:816::2004) 56 data bytes

100 packets transmitted, 100 received, 0% packet loss, time 1528ms
rtt min/avg/max/mdev = 18.783/42.704/119.212/33.367 ms

$ sudo tc qdisc del dev enp7s0 root netem latency 0ms 100ms
This will have added 0 base latency, but 100ms of jitter, or latency variance. Effectively, the computer will pick a random number between 0 and 100ms for each packet, and add that much latency to it.
Example5: Limiting Bandwidth
You can limit the bandwidth of a network interface with the following commands.
$ sftp localhost:/home/dwg/ubuntu-24.04-netboot-amd64.tar.gz .
ubuntu-24.04-netboot-amd64.tar.gz             100%   81MB 952.4MB/s   00:00

$ sudo tc qdisc add dev lo root netem rate 10mbit
$ sftp localhost:/home/dwg/ubuntu-24.04-netboot-amd64.tar.gz .
ubuntu-24.04-netboot-amd64.tar.gz             100%   81MB   1.2MB/s   01:08

$ sudo tc qdisc dek dev lo root netem rate 10mbit
$ sftp localhost:/home/dwg/ubuntu-24.04-netboot-amd64.tar.gz .
ubuntu-24.04-netboot-amd64.tar.gz             100%   81MB 965.9MB/s   00:00
Remember, just like with tc earlier, this only impacts packets being SENT by the system, which is why this demonstration used sftp to localhost, as the packets then will both be sent and received by the lo interface. If you wanted to do this to test an application, you would need to do it on the server, or follow the bridge solution plan listed later.
Other Options
- I’ve not written up how here, but digging in the further reading and the man page will help you discover how. You can also do packet reordering, packet duplication and many other things using these tools.
The bridge solution
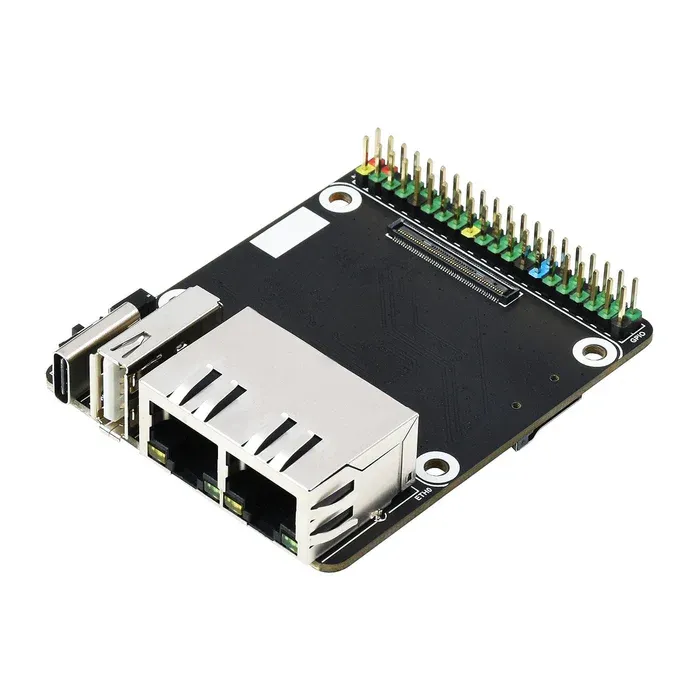
I have a Rasbperry Pi 4 with a board adding two network interfaces, which I use to simulate these network conditions. It is deployed as a “bump in the wire”. The two physical interfaces are configured as a bridge, and frames arriving on one interface are simply copied and sent out the other. The Pi is in effect a two port switch, but one which tc can mess with.
My tc config is divided in two queues, one for the frames that are being forwarded, and one for the frames that contain packets to and from the management address of the Pi itself. This way SSH and other control traffic is unimpared, but traffic going “through” the device can be impared as desired.
The software configuration of this device is a bit ugly, but perhaps if I get time I can clean it up and make it more reproducable by others and stick it on github.
Recommended Test Suites
If you want to test an app to death, I’d use at least the following tests.
- Test with geostationary satellites latency, about 500ms.
- Test with double geostationary satellite latency, about 1 second. This is how users in Antarctica will experience the network much of the time.
- Test with high loss, I would recommend 10% random loss. Over this it is reasonable to expect the application to just not work, unless you have special reasons it should.
- Test with high jitter. I’d recommend +/- 100ms.
- Test with packet duplication. I’d recommend 10% duplication. This should so any duplication errors without being excessive. If you are using standard TCP this will just slow down the application, but if you aren’t you may expose application bugs and quirks here.
- Test with packet reordering. Similar to above, TCP again should just be a slow down, but some other apps may expose bugs and quirks here.
- ”Tunnel Test”. Script the loss so you get periods of good connectivity, and periods of 100% loss. This will show how the app behaves when users go through tunnels and the like. Check it recovers and works fine after the connection is reestablished.
Further Reading and Notes
- Frederic Boismenu’s deep dive in to TC - This goes REALLY deep into what TC can do and how it works.
- ifconfig.it guide to bridged TC - This is similar to my bridge solution and should get you going if I don’t get around to writing up mine.
- You can add correlation to packet loss, for example if you just dropped a packet make it more likely you will also drop the next one. See the Deep Dive or the man page for more info.
- You can use different distributions for your delays. For example, adding
distribution normalto a loss command will cause the drops to be on a bell curve around the percentage you specified. - You can chain multiple loss conditions together. For example, you could add a general 1% flat packet loss, then 3% additional loss in a normal distribution.
- Make sure you aren’t testing the tester. If you run this on underpowered hardware, or try and do packet filtering at 40gbps or similar, you need to make sure your tester is not the bottleneck.